I recently had someone reach out to me for a unique opportunity. At first, it seemed like they wanted a traditional rectangle frame. Then they sent me the following photo and asked if I could make a frame shaped like that for a mirror.

I had never made a frame that didn’t have 20180905_074734.jpg45-degree angles. At first, I didn’t know if I could honor the request. I analyzed the photo to determine what work would need to be done. The only dimension I got was the width of the frame at the top and to make the rest of the frame in proportion to the photo. I knew it wouldn’t be easy but I decided to take on the challenge anyway.

From the photo, it looks like the mirror sits on top of the frame but I had to make the frame similar to a picture frame where the mirror would be inserted from the back. While I wasn’t expecting this to be a problem, I started running into problems as soon as I was ready to start cutting out the grooves for the mirror to sit in. I usually run the wood through the saw to cut the grooves all the way through. Because the thickness of each side was different, and the angles were not 45-degree, I was not able to do that on the left and right sides.

The steps I took to create the frame were also different than the normal steps I have been taking. Instead of being able to get into cutting right away I had to think about how to cut the pieces without messing anything up. I had to figure what the angles would be so I wouldn’t need to wing it and hope it worked out. Here I have all the pieces cut slightly longer than needed and the angles marked out.

20180908_103010.jpg

The next step was to cut the angles.20180908_113808.jpg Instead of setting up my miter saw to the separate angles, I decided to do it freehand by lining up the lines to the saw blade. I had to make sure that I was very careful to not cut off too much. In most of the cases, I cut where there was a little left to cut so I had some room to work with. I was happy when I had all the pieces cut at the correct angles and they all fit together perfectly. Now that what I thought was the hardest part of the project completed, I began to work on how to start shaping the pieces to look more like what the photo looks like.

The whole time I’m thinking about the best way to do this I’m also thinking about how I’m going to glue the corners together. I decided to put the thought on the back burner and continue with the task at hand. Luckily I was able to borrow an oscillating sander 20180908_165547.jpgwhich made it much easier for shaping the inside of the frame. Before using the sander I had tried a couple other approaches. On the right side, I had tried to use a small saw to cut out the majority of the wood by hand. I found this to be quite tedious and was taking too much effort so I decided to pull out some straight edge chisels to break off the wood. That seemed to be working good until I noticed in a couple of spots it was taking more wood off than what I wanted.

I decided to change gears and see how the sander would do. I typically don’t like to use a sander to make pieces smaller as it produces a lot more sawdust. After trying this approach though I decided it was much better than my previous attempts. I was excited to see the frame starting to take shape though. It’s always nice to see when a plan is working out.

Because I knew I wanted 20180908_172410.jpgto have squared off outside corners to help with gluing the frame together I decided to not worry about starting on those yet. I was happy with the results I had so far on the inside and could see the frame taking on a shape that is really close to what the frame in the photo looks like. I didn’t take any photos of the next step, which was to cut the grooves out for the mirror to sit in. The top and bottom were the easy pieces as I was able to run those straight through on the saw. The left and right pieces were a little more difficult.

As I did with trying to figure out how to get the excess wood off of those sides, I had to think about how to handle this approach. What I decided to do was mark out how far I could use the saw and run it through that length. In hindsight, I believe I could have made things easier on myself and made the grooves a little wider on the top and bottom, but based on how to make frames for photos I only wanted the grooves to be in so much. At first, I decided to take my chisels and try to cut out the grooves on the corners but again found that to be too tedious and open to mistakes. I decided a better approach was to use my Dremel and that made things much easier.

20180908_204459.jpgOnce the grooves were cut I was ready to glue the frame together. I have a jig I built to help with this but when trying to fit this frame into the jig I couldn’t get it to fit. The bottom was too narrow. I had another jig, but that wouldn’t work because the corners needed to be at 45-degree angles. So back to the drawing board I went. I remembered seeing people use tape to put corners together in some videos I had watched so I decided to see how that would work.

In addition to the tape, because I knew it wouldn’t create enough force to keep the corners tight, I had to also find a way to tighten up the frame. I had clamps that fit the width of the frame but not the length. I got creative and used two clamps together to do that. It did take me a little bit to get everything lined up correctly so that the corners were not off at all. Now all I had to do was wait until the glue dried so I could continue to the next step.

While waiting I decided the best thing to do for time to pass was to work on another frame. I’ll be posting about that frame in the future as I’m still working on it but I do like the idea I came up with. It worked out nicely because before I knew it, the mirror frame was ready for more shaping. The rest of the project from here was quite easy as it only required putting the splines in and more sanding and shaping. The splines were not as difficult as I was expecting and turned out nice. The frame was made out of pine and I put in oak splines. I like the contrast it gives.

The buyer wanted to finish the frame off himself so this is as far as I had made it. He initially wanted to paint it but after seeing it, and my suggestion, he decided that he will stain it instead. He was very happy with the results and said that I far exceeded his expectations. I have asked for an updated photo of the finished product and he said that he will be happy to show me. I’ll post an update once I receive the finished photo. All in all, I was very happy I took on this project. I learned some new skills and have proven to myself that the frame doesn’t need to be square or rectangle for me to be able to make it. For comparison, here’s a side by side of the photo I was given to the frame I had created.

20180910_064512.jpg


This slideshow requires JavaScript.


Don’t forget to follow me on Facebook so you don’t miss special promotions or chances to win a custom stained wood frame. JTA Custom Framing


Custom Mirror Frame


Once you get your photography to a certain level and you start to like your work more it makes you want to print your work. Printing isn’t too expensive on its own but when you start looking at how you want to display your work you start to explore your options. The most common option is to frame it and hang it, but framing can become expensive, especially if you don’t want to buy the cheap plastic frames. There are so many different frames of all different colors. Then there are mats. The possibilities are endless. Then you sit there thinking there’s too much to think about and push it off thinking you’ll have more time to think about it later. Then later never comes and your work is still not hanging on your wall.

This is exactly why I decided to go simple. Throw out all of the options but one and have no regrets about my decision. That’s when I decided I wanted to build my own frames and keep them simple. I don’t have to pick between 100’s of designs or colors. I limit myself to a few decisions which makes the process much easier. Now the hard part is which photo do I want to frame next?

20180722_181549.jpg

It would be nice to have more time to make more frames, but there are always other obligations. The good news is that I’ll always have time to do a frame or two every month so even though they aren’t coming in fast, I’ll at least be slowly building my inventory of photos to hang on the wall. I like it this way anyways. It gives me time to think about new ideas and how to do them. As you can see in the photo above, the frame has rounded corners. I was able to do this using my router. I’ve got a few different router bits and plan on trying different things. But it all comes back to keeping it simple so I don’t plan on getting too complex where it’s hard to duplicate in case I would like to make multiple frames the same way.

I also try to make my photos simple too. Including too many subjects in your photo hard to understand not knowing what it’s trying to represent. This photo I took is a good example of that. I knew that I wanted the main focus to be on the sand dollar but not have any major distracting elements in the photo. I’ll admit that the sand dollar wasn’t exactly on the beach when I went to this location, but the sky lacked any clouds for the sunset so I decided to bring it along and use it as a prop to help create a photo that I think turned out nice.

What’s the biggest challenge you have with getting your photos on your wall?


Don’t forget to follow me on Facebook so you don’t miss special promotions or chances to win a custom stained wood frame. JTA Custom Framing

Go Simple


It’s been over 2 years since my last post and I didn’t know if I would ever be back. Well, here I am! I’m not sure at this point how often I’ll post but I’m going to try to make it weekly, or at least monthly. I’ve been taking a lot of photos and have also made it to the next level in my photographic journey. I haven’t been taking as many photos as I have in the past but I have been getting better.

As to what I mean by the next level in my photographic journey is that I have now started making custom stained wood frames. I’ve been wanting to do this for a while but lacked the time and tools to do so. Now I only lack the amount of time I would like to put into it, but I do have the tools. So what I do for now is make the time.

Here is my first frame! Well, technically not my first frame but the first oak frame. My first frame was a prototype to make sure I had the process down. I am really happy about this frame and learned quite a bit in making it. I have refined my processes and made some jigs to help with making picture frames and have been very happy with my progress.

20180205_222503.jpg

Why did I choose oak to use? The biggest reason is that I had acquired a decent amount of oak wood from someone that had been torn out of a building to be replaced. So instead of letting it go to the burn pile, I decided to put it to good use. Because of that, you will see some random holes in some of the frames from nails or screws that were previously in there. I do however have plans for using different types of wood and experiment on different ideas just like I do with my photography. I picture that my frames, just like my photos, are another form of art.

Last summer I had made a trip to Europe and visited Paris as well as a few places in Germany. It was a great experience and would love to go back someday. Of course, when you are in Paris, you have to get a shot of the Eiffel Tower! This shot was more luck than anything. As my wife and I were walking along the sidewalk I happened to look over and seen a perfectly framed shot so I had to take it. I love how the trees help frame the shape of the Eiffel Tower. For the frame, I cut 2-inch pieces and used a black stain. One thing I learned about trying to stain Oak black is that it is a bit difficult to get it truly black. You may be able to see a slight brownish tint to the frame but it is easier to see in person. The photo is 20 x 20 inch and currently hangs in my living room above the fireplace.

20180306_173534.jpg

I’ve got more to share but will save those for other posts so this one doesn’t get too long. In addition to making the frames, I’m also selling them. You won’t find me posting a lot of “sales” type posts though because I don’t believe in pushing people to buy. But, if you are interested and would like to find out more you can message me or visit my facebook page here: JTA Custom Framing. You can also read more information on my journey on making picture frames as well plus see some additional photos and frames.

BTW, if you would like to have a chance at winning a custom-made 8×10 or 8×12 inch frame, once I get to 100 followers I will do a random drawing to choose a winner. It doesn’t matter where you live. Everyone will be eligible.

Don’t forget to follow me on Facebook so you don’t miss special promotions or chances to win a custom stained wood frame. JTA Custom Framing

Hello!


I ended up having some time away from work and decided to make a trip to a set of falls I’ve been wanting to visit for awhile. Now that I live an hour closer to them it makes the trip a little easier and I’m hoping to make another trip to them sometime during the summer. For all of these photos I had on my gear to go walking into the water to get different perspectives. For the colored photo with the reflection I ended up waist deep in the water. I was trying to get closer but it got too deep but I’m glad I was forced to get the photo I did as it allowed to capture the reflection in the foreground.


Bond Falls

2015 in review


Although I wasn’t able to keep up like I would have liked, it was still a great year. Some of the great things that happened this year was getting a flash, finally taking some professional looking photos of one of my babies (only took 3 tries, lol), and learning how to take much better photos of flowers by using the flash. I’m hoping to get back into the swing of things once things start to slow down.

For now we’ve just got our first big snow fall for the year and I’ve started a new project of building an ice rink at the new house. I’m hoping it turns out but if doesn’t turn out so great then I’ve learned one way not to do it next year. I hope you all have a great New Year’s and may the next year be even better for you!

Happy shooting!

The WordPress.com stats helper monkeys prepared a 2015 annual report for this blog.

Here’s an excerpt:

A San Francisco cable car holds 60 people. This blog was viewed about 2,600 times in 2015. If it were a cable car, it would take about 43 trips to carry that many people.

Click here to see the complete report.


I hope everyone is having a good end of the year. I know it’s been awhile since my last post. I don’t have any landscape photos ready to post yet and I’m not sure when I will have any. I’ve been busy with moving and still getting things situated. I do have photos to process and I’m hoping to get out this winter to get more. My plan is to be back on here hopefully this winter or in the spring at the latest but we’ll see if that happens.

This photo wasn’t taken with my DSLR but with my phone. Homemade pumpkin pie with graham cracker crust in 1 cup ramekins.

20151121_145321-01.jpeg

Happy Holidays


You must be thinking since there are 3 posts this week that I’m back to my normal schedule. I wish! Actually, I was able to schedule the 3 posts with photos I have taken a couple weeks ago. Unfortunately I still don’t have time to keep up with my blog yet, but I’m hoping in a month or two that I will.

For this post I’ll keep with the theme I have going for the week. Sunflowers!

DSC_5367

This one was taken with my macro lens. I wasn’t really quite sure what I was going for but I knew I wanted something that would show quite a bit of detail for parts of the flower but have a shallower depth of field. After taking a few different angles this one stood out the most to me. It’s almost like the sunflower has an eye and it’s looking out.

I’m happy that my wife and kids decided to plant some sunflowers this summer as it gave me new subjects to shoot. I’m hoping at our new house that we’ll be planting some next year to do more experimenting. We’ll also be planting a garden and hopefully my wife will plan more flowers. I’ve found that I enjoy photographing these things and experimenting with my flash when possible. I’m looking forward to shooting more sunflower plants while experimenting with water and light.

The Eye


When thinking of a sunflower you usually think yellow leaves with a darker, brown or black, center. But that’s because most sunflower photos look like that. There are a few that show the sunflower in the state before it starts to get ready and grow its seeds. During this stage of its life there’s a green center which can be very appealing.

DSC_5364

Now to throw another photo into the mix for a little quiz.

DSC_5359

Both of these photos look very similar and that’s because they are of the same sunflower. Now for a question. One of these were taken with the Nikon 20mm f/1.8 lens and the other with the Nikon 105mm f/2.8 Macro lens. Can you tell which is which? It’s very difficult to tell just by looking at them. But if you look close enough you can see the little differences that just might tell you the answer. And for those who are wondering, yes I did crop the photo taken with the 20mm lens. But not by much and to give it the same frame as the macro shot. I also did this just to show how such a big difference in focal length doesn’t always mean a big difference in the final outcome.

A Hint of Green


It seems like it’s been forever since my last post. Somehow I was able to squeeze in a few minutes to take a few photos and then edit them a couple weeks later. When I went outside to do something I noticed the sky was perfect for a photo I wanted to get so instead of letting the opportunity pass by I went and grabbed my camera to take a few photos. And here is one of them.

DSC_5346


Although it almost seems like this photo was taken as a long exposure but it wasn’t. The clouds were the wispy type so that worked out really well for the look I was going for. The sun was right behind the flower to help with back lighting and it was still bright enough out that I was able to pull the details out of the shadows for the flower itself without needing to use a flash. This photo was taken with the Nikon 20mm f/1.8 lens. I still like how close I’m able to get to the subject and am still really happy with the sharpness with this lens.

I am also happy to announce that we have our house sold now and just got an accepted offer on a new house. It will be exciting to get this process moving forward and done so I can get back to what I love to do in my free time. The new house has high speed internet access so I will be able to keep up with my blog. I’m also looking forward to the additional free time once things start to settle down a bit.

Looking Up


I know I said I was going to post what the photo that I posted two weeks ago last week, but I couldn’t find the time. So here I am a week late. Better late than not at all though.

Here is the edited version so you don’t have to view the last post:

image

And here is the original that I used to create that photo:

image

Now can you see what it is? It’s an orange, but more specifically,  a mandarin orange. I liked how it looked when I peeled it so I decided to take a photo of it. Don’t know when my next post will be. I’ve been busy getting things moved out of my house and searching for a new house. Looked at 4 so far and haven’t liked any of them. I’ve got quite a few on the list though.
The next one is less than half an hour from Lake Michigan so it would be nice to get that one. I hope we like it. Two state parks near by as well.

Until next time!

Reaching – Original


image

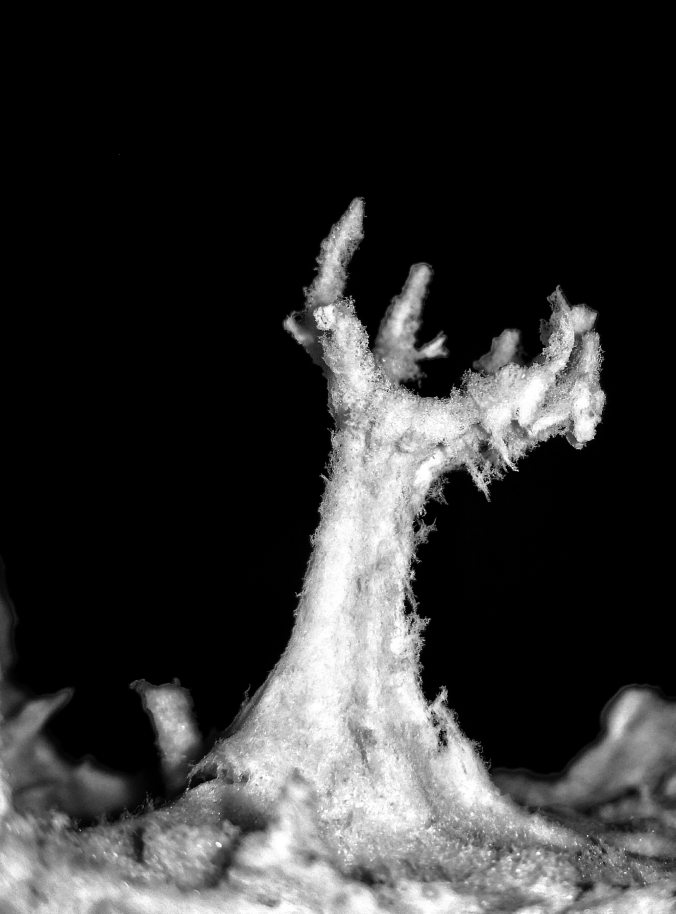
You are always told to not play with your food, but where is the fun in that? With that in mind, can you guess what the above photo is of? You won’t find out in this post. To me it looks like it could be a minuature tree reaching towards the sky.

Unlike my other photos this one was taken with my phone and edited in snapseed. Once you have a vision and the tools to create that vision, it doesn’t matter how well those tools are as long as they get the job done. It would have been nice to use the DSLR but I didn’t have access to it at the time. LR would have been nice to use but I didn’t feel like going through with the amount of time it would have taken with transferring the photo over and doing the processing. Plus I was happy with the results I got anyways.

I wish I could say that there are more photos coming soon. Instead I’ll say that I have no idea when I’ll be able to process more or even get the camera out again. I’m still working crazy hours, a couple weeks with 70, and on top of that in the process of selling and buying a house. Add trying to keep up with three kids and that leaves me with very little sleep each night and no time to even think about photography. I’ve got David DuChemin’s newest book and some other photography materials but no time to go through them. I think about how much I wish I could and still I wait until I have the time. Patience is something I’ve learned to live with.

I’m hoping this busy life will slow down soon so I can get back to what I enjoy. Until then have fun guessing at what I have presented you with.

Reaching

Update


image

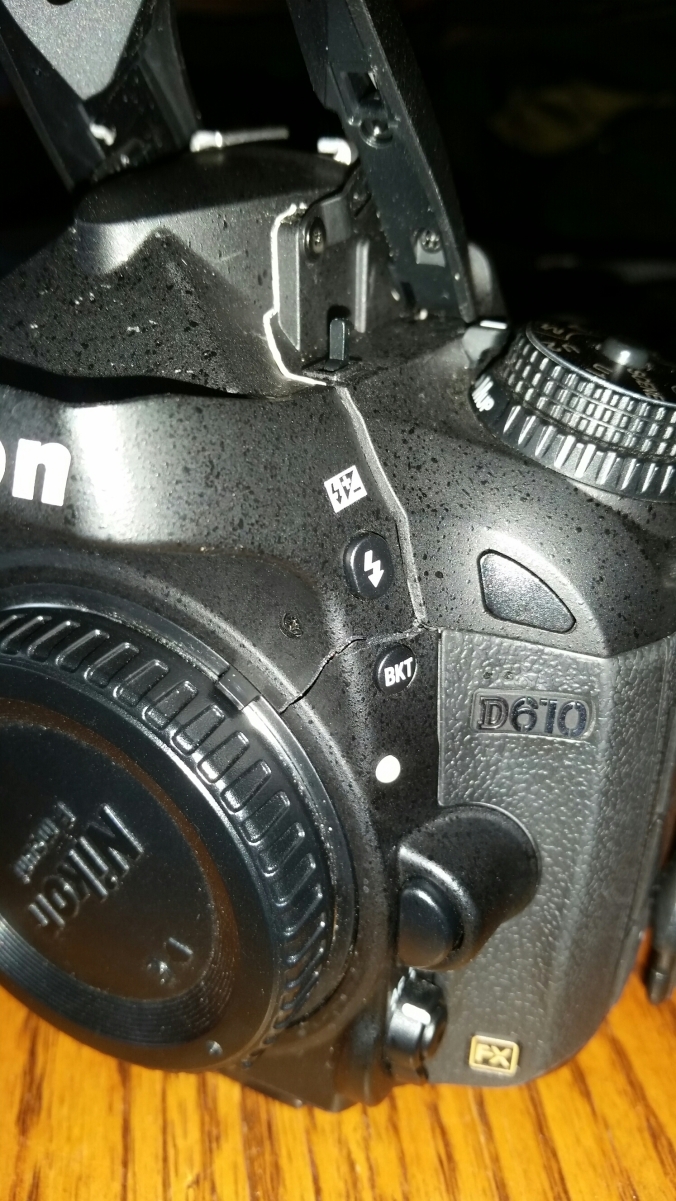
It’s been awhile since I’ve made a post. I’ve been rather busy trying to keep afloat so decided to take a break from photography for a bit. I was still getting the camera out from time to time but as you can see from the photo above it is now cracked. It happened a few hours before my brother’s wedding. Funny how these things happen just before it would be nice to have them.

Anyways, thank god I wasn’t shooting the wedding. I’m also lucky enough to have insurance so the damages will be covered. For those wondering, I had my camera on the tripod and was doing some macro shots. I moved a chair and next thing I heard was my camera hitting the patio floor. It hit on the screen side. I’m thinking due to the weight of the lens it helped smash in the front and cracked the body. The auto focus doesn’t work and the grid lines don’t show up anymore.

Currently my camera body is being shipped to a Nikon repair center to get an estimate for the insurance company. Who knows how long I’ll be without it. My camera has had bumps here and there so I thought it would be fine after this fall, but now I know to be a bit extra careful when moving around.

I’ve still got photos to post but not the time. I’m hoping to be posting again within another month or so. Thought I’d drop in to say hi and let you know that I’m still here. Until next time!


Frosted with Pollen

Click on the image to view a high res version.

Focal Length: 105mm
Aperture: f/20
Shutter Speed: 1/200
ISO: 100

I really enjoyed shooting this flower. I couldn’t seem to get enough shots of it but had to stop at some point. I’ve still got a lot of photos to edit but having a hard time finding the time to do so. The pollen on this flower almost looks like frosting. The flowers have since died and are now gone though so I think it may be time to pick up a new batch and give them a go.

Frosted with Pollen


I don’t really have any time to put together a post like I would want so thought I’d just put a gallery together of some photos I took last summer while camping. The gallery contains photos of different  mushrooms and a variety of other things I thought were interesting.

I would also like to note that I know it’s time for the next chapter to be posted for my book but I haven’t had the time to go through it to do any updates so it’s not ready yet. So for now that project has been put on hold. I’m not sure when I’ll get back to it but I’m hoping to within the next month or so. Sorry for those who are patiently waiting.

Photos for Inspiration